This is my prayer book. I made it using a scrapbook that has pages that are 6x6 inches.

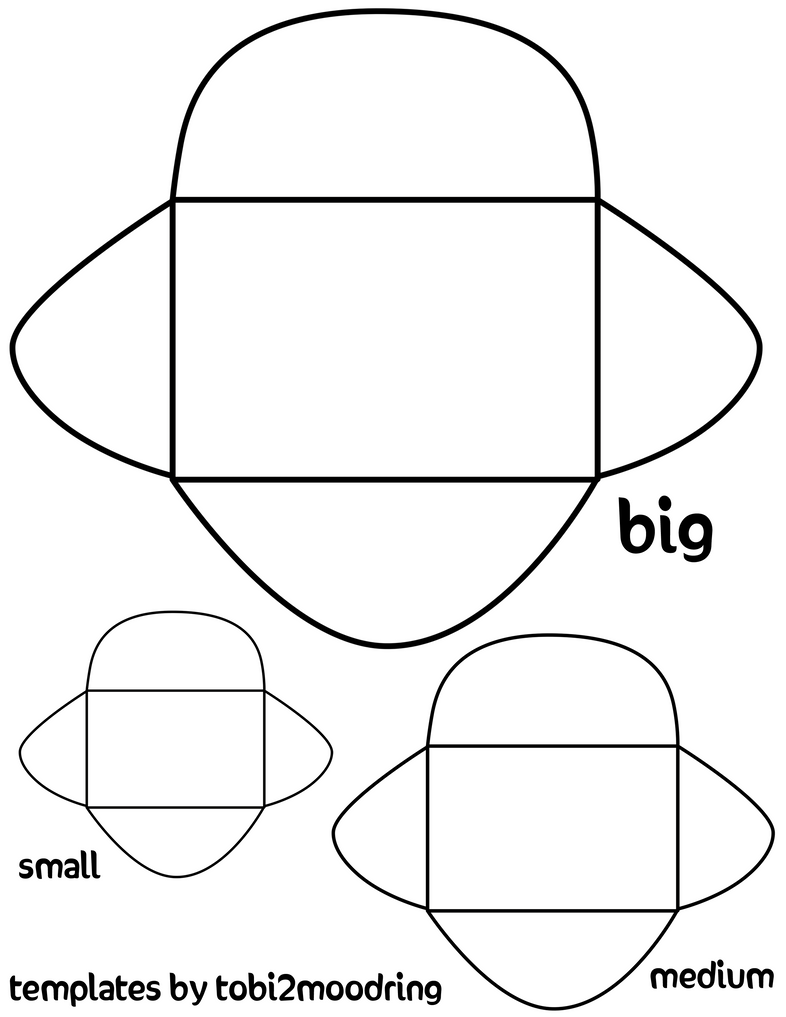
The cover is covered with wallpaper samples that my sister gave me. They are just glued on. For photos of the steps for the cover and back see my first post... the link is below. Each page is first covered with scrapbook paper. Then I add the envelope but leave the top open. Some I had to trim or shrink with my printer so they would fit my page. I tried each pocket on regular printer paper before printing on cardstock for final folding and gluing. The other pages of my prayer book may be seen HERE... some of them were replaced by pages I updated last week.
I use 3x5 cards for my family for things that are more long term. One of the things I have done is copy some of the prayers from Power of a Praying Wife or Power of a Praying Parent so I can have them handy to pray when I feel my husband/children need them. For other requests, like online friends for instance, I use scrap paper so I can just throw out the paper when it is no longer relevant.
The templates for the envelope/pockets on the new pages are below each picture. Under that are the pockets I used in the other pages. Under that are some cute envelopes I found while trying to re-find the links so I could post this. I will use some of them next time I need to redo a page(s).
When doing the pages I take the book apart... When you do this remember how the pages go on, especially the front and back cover so you don't have to do this over and over by trial and error to get it right like I did. It is easy to pull the rings apart and slide the pages off and on.
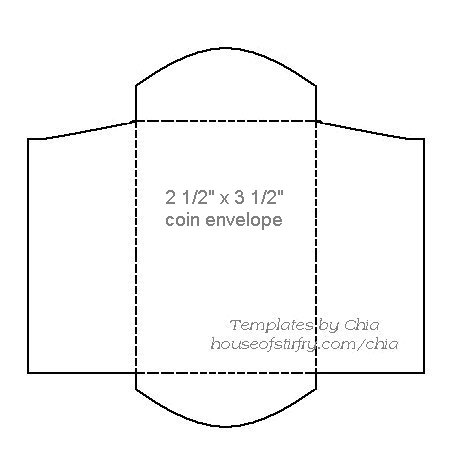
I completely redid my hubby and boys pages. I threw out the page and made a new one from scratch because the hubby and boys pages were back to back and I had extra pages that I saved when I first made the book. I redid them not just because I was not happy with the scrapbook paper and overall look of the pages but mostly because I was not happy with the pockets. I used the Coin Envelope.
Coin Envelope
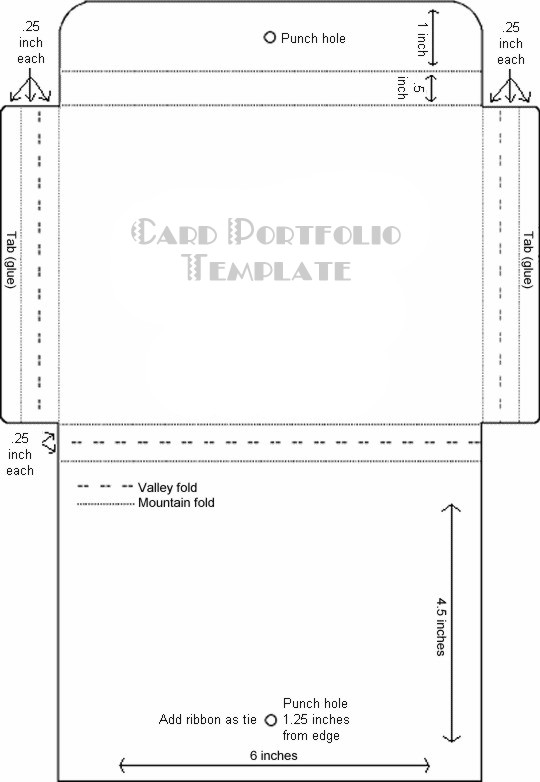
I am still not thrilled because I need a larger pocket for my hubby. When I am ready to redo it I will probably use the Card Portfolio Template below because it has expanding sides like a portfolio would have. That will give me the expansion I need because I have a lot of things to pray about for my hubby.
I like the way the boys new page turned out. I especially love the Lego stickers.
CD Template
at the time of posting this link was not working for me, this pocket can easily be replaced with one below that you like if the link does not work for you.


I can't find this pocket any more. I didn't reprint the pocket I just changed the stickers and the oval name because I didn't need the category that this had been before I changed it. Oh, and this page now says Blog and Facebook friends. I needed a place to put non homeschool Facebook friend requests (I already have a homeschool friend pocket so that covers them).
I redid this page because I didn't like the pocket at all. I like this much better.
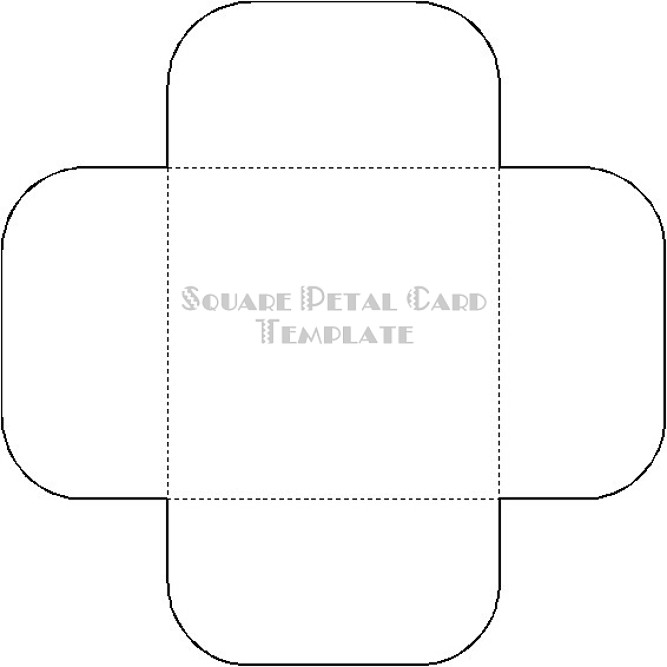
- Postage Stamp Envelope Template
- Envelope for Artist Trading Cards (3.75 x 2.5)or Credit-Card-Sized Gift Cards
- Library Card Book Pocket Template
- Interlocking Envelope Template
Repentance pocket templates and directions:
http://www.4shared.com/photo/dur68AxT/envieclippinmask.htm
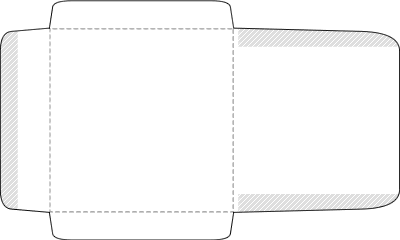
Repentance page - this one is a little more complicated. The first thing I did after saving these png's is lighten them with my Picasa program. I did not want to print all that black so I lightened them both to gray like this:
I printed both pages on cardstock. Then I covered the back side of the cardstock with scrapbook paper... gluing it down well. Make sure you cover the side that doesn't have the printing on it so you can cut them out after you glue down the scrapbook paper. I used complementary colors but different designed paper for the top part and the bottom part which is the liner. I folded all 4 sides in for this one and I keep the "lid" closed with velcro. See directions for using the Cricut here and more pictures as well. http://thefrugalcrafter.wordpress.com/2009/08/14/envelope-and-liner-free-template/
Some templates I didn't use but will in the future

I didn't use this one because I just found it but I like it a lot and will use it next time I update or add a new page... Scrap Envelope

lots of templates here at Homeschool Share including pockets:
http://www.homeschoolshare.com/lapbooking_resources.php
http://www.homeschoolshare.com/lapbooking_resources.php
If you have an questions just leave me a comment and I will reply to it in the comments and if needed update the post as well with a NEW NOTE: so you will see it.
 all content on my blog is ©







2 comments:
I like this post. Thanks for the work you put into it. Seems like prayer books are such a nice thing to do
thank you so much for the templates love them all! <3
Post a Comment