
The purpose of Think Back Thursday is to link up a photo post about something from the past. You can reach back all the way to your childhood and bravely post pictures of you in your wild clothes and hair styles or post something from last year and tell us about it. I'm not picky. Hey, even yesterday was the past... LOL I hope you will join us.
I am not going to tell you every little thing about Picasa 3. I was considering going into great detail but many things are just logical and normal to any type of program and so I am going to skip them.
The first thing I want to talk about today is the collage function. It is such fun. I have done a bunch of these. You can select the photos you want to include by pushing Control on your keyboard and clicking the photos. If you want to choose a batch of them in a row you can choose the first photo and then push shift while choosing the last one. After choosing a batch you can add individual photos again by keeping the Ctrl button pushed down and clicking on more photos.
You will also have an option of adding more photos later and may just find you prefer to just click on one photo and then add the others from the Clips tab... see below.
The selected photos appear in the bottom left hand box.

This is a close up of the bottom center. The button to the right of the Share on Google button can be adjusted in the Tools tab at the top. This is another one of the thing I found while working on this blog post. COOL!!! I added the Movie, Collage, GeoTag and Blog This buttons to the toolbar.
So once you have selected the photos you want to put in your collage you push the Collage button.
If you haven't put the Collage button on your toolbar yet you can choose Picture Collage in the Create tab at the very top of the Picasa program.
Once inside the Collage tab you will find many fun options.
You can add a border to any of the pictures. You can choose a background color for your collage or choose one of your photos as the background.
If you choose the tab in the background that says Clips you can add more photos to your collage from there if you want them. They make it very easy. Just a '+' button for adding and an 'x' for taking photos off. You can also add photos from other folders by pushing the get more button.
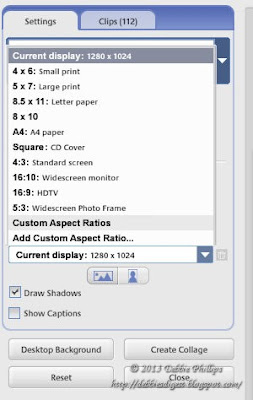
You can choose the size of your collage and the format of it.
There are a variety of choices for arranging your photos.
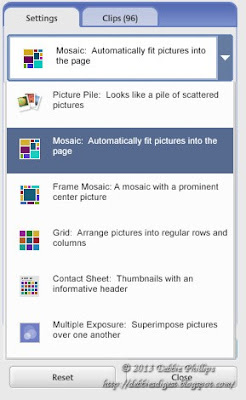
Frame Mosaic lets you choose one photo for the center and the other photos are smaller squares that make a frame around that one. Grid makes all the photos the same size. Contact Sheet does the same thing except smaller photos like a sample sheet for choosing the photos you want printed. Multiple Exposure I have not played with yet, but I will and I am sure if I get a good photo combo and figure that option out that I will share it with you all.
This is the regular Mosaic option. It automatically fits the pictures into the page, but in varying sizes. You cannot change the size of any one picture but there are things you can change.
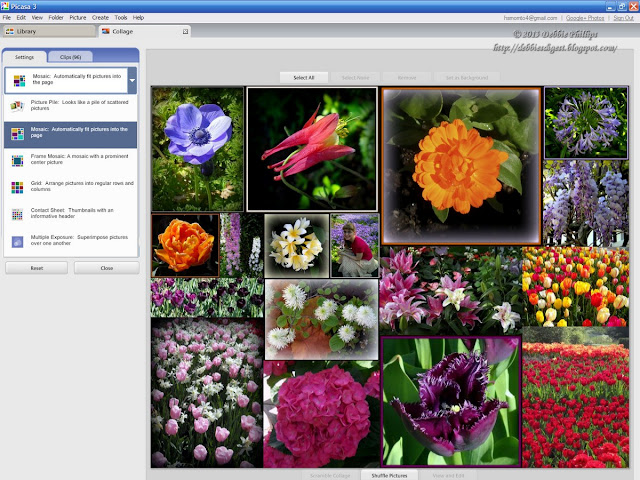
You can push the shuffle button at the bottom and it will sort the photos in a different way. Keep hitting shuffle until you get an arangement that you like.
OR
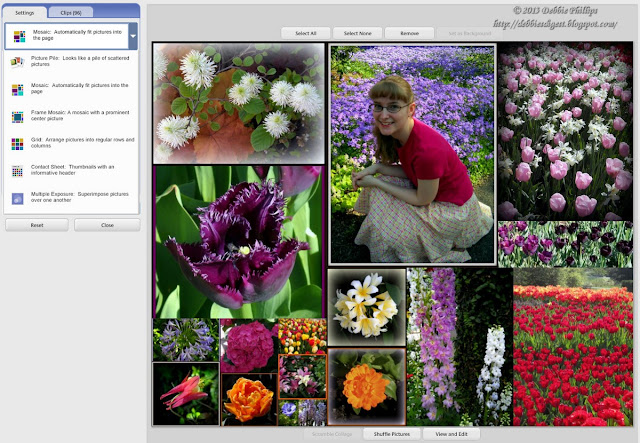
You can also swap individual photos by clicking and holding your left mouse button on one of the photos you want to swap, and dragging and dropping the photo on top of the one you want to swap it with.
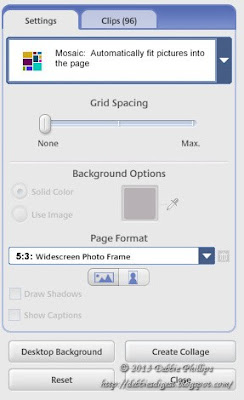
Here are the buttons for the Mosaic option. You can have space between the photos or not. If you choose to have space then you can, again, choose your background color. You can also choose landscape or portrait layout and resize the page.
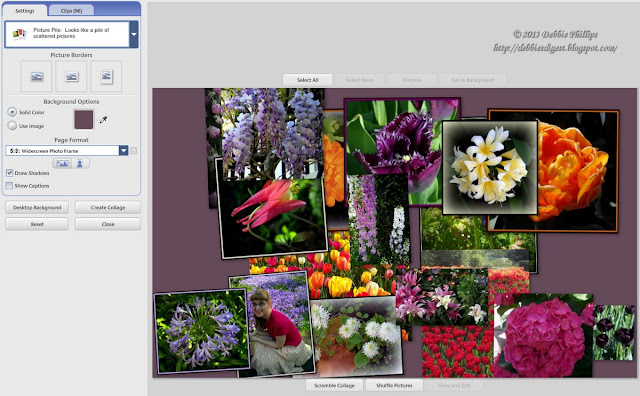
This is the picture pile option. The pictures just get piled on top of each other. You can drag them around to where you want them.
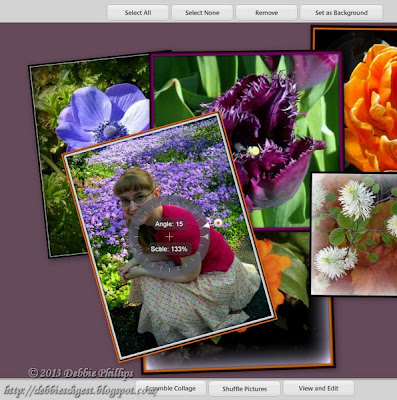
When you click on a photo it gets an orange box around it.
Then you can move the photo, resize it and rotate it. You put your mouse arrow on the white circle with the orange dot in the middle and the arrow will change to a hand. Move the hand to the right to enlarge the photo. Move the hand up or down to rotate the photo.
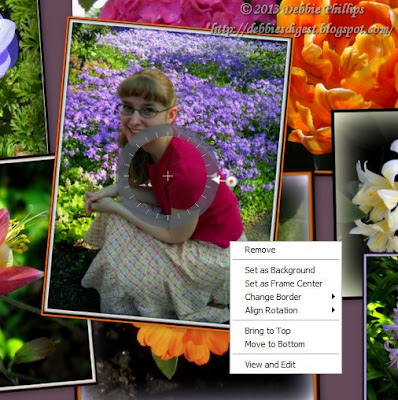
Right click the photo and you get more choices... including moving the photo to the top to bottom of the pile. You can't move photos except top to bottom but clicking on various photos and moving them from top to bottom you can layer them just the way you want them.
The next feature I want to talk about is the movie feature.
You can upload a movie from your camera and edit it, but I am going to show you how to use the movie feature to make a slideshow.
Once you choose your photos, and push the movie button on the bottom you have many options of things to play with.

You can change the length each slide is shown as well as the dimensions of the slide show.
You can change the text on the introduction page of your slideshow as well as the color and style of the text and background.
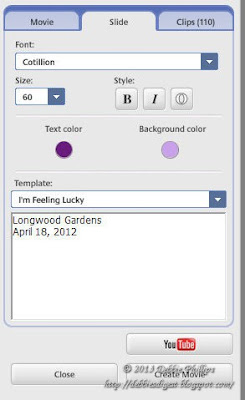
You can also change the way the slides transition from one to another.
When you push Create Movie you see this
Then you will be able to view your finished movie, go back and edit you movie, upload it to You Tube so you can put it on the web and other options you can see below.
Here is the final short slideshow I made for you to show the finished product.
Blog This!
Lastly I found this new feature that I did not know about. Right from Picasa I can add all or some photos from a folder straight to my blog. COOL! That is really convenient.

Once you have selected a photo or folder push the button for 'Blog This'. If you have not added this button you can find 'Blog This' under the Create tab at the very top.
Once you click 'Blog This' you get these options.
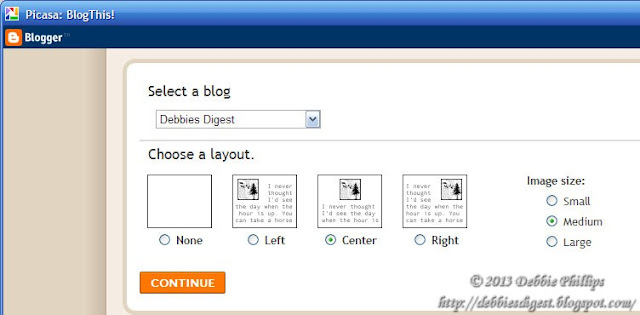
Choose layout for your pictures, which you can of course change later, for all the photos or individual choices, and choose image size.
Choose continue and you get all your lovely photos in a row, ready to add text around them for a wonderful blog post.
Add a title. You can make changes right here or you can press save as draft and your pictures will be in your post, ready to add text around them for a wonderful blog post. I personally would rather choose save as draft and then go into Blogger to work on my post. There I know Blogger saves my post every so often, automatically. I am less likely to loose my work. But, you have the option to write the post right there.
Well that is it. There are other tabs and features you can discover if you download this
free Picasa program.
Here are the other parts of this series in case you missed any.
Each link will open in a new tab for you.
Playing with Photos Series
Think Back Thursday ~ Playing with Photos - Picasa
Think Back Thursday ~ Playing with Photos - Picasa, part 2
Think Back Thursday ~ Editing Photos with Picasa, part 3
Think Back Thursday ~ Picasa Week 4
I currently use another program to add my watermark and resize my photos. I may be able to skip this but it will take time to figure that out. I see I have some more playing with Picasa to do. I may be able to do the watermark but I am not sure about resizing the photos. Cropping, yes, resizing??? I promise though that I will not do another complete Picasa tutorial. But I may share a thing or two if I make any more discoveries.
Next week we are back to more normal Think Back Thursday topics.
March 14 - Signs of Spring
March 21 - Field Trip/Vacation
March 28 - Easter
Here are the Rules for participating:
- It can be about you, about your kids, about your parents, whomever. You can include video, I will not exclude video alone posts, but I prefer them along with photos, as this is a photo meme. I am doing a weekly theme now. That should help narrow it down from the myriad of photos we all have. For ideas check out the other posts in my label Think Back Thursday.
- Link up below. Please use a permalink that sends readers directly to the correct post. If you are not sure what that is click the word permalink for an explanation.
- Mention my blog and offer a link back. This is a requirement to take part and a kind gesture to me your hostess as well as your readers--they will know where to join in the fun, too. You can put the Think Back Thursday button on your site and in your post. You will find it on my right sidebar. Please use it to link to my site, to spread the word about my meme. Using the button will help others know how to find me and how to join. Tell others to click on the button in your post to find us here.
- Leave me a comment. First so that you can let me know what you think of my pictures and secondly so that I will know a new post has been linked up and I can come visit your blog and comment on your photos.

all content on my blog is ©


2 comments:
I never knew how much stuff you could do with the free version of Picasa. I think I've downloaded it, but never really used it. I'll have to add "playing with PIcasa" to my to-do list. :)
Your pictures are very cute. I love the Think Back Thursday meme!
Post a Comment